Facebook has rolled out many new features over the past few years to optimize communicating with your customers. In this article I will introduce Facebook’s automated messaging tool. This tool allows you to provide your customers with instant communication information on your business and services, even if you are away from your computer or phone.
In this post we will begin by explaining the basics, then provide you with examples, and end by elaborating on a few advanced features.
Introducing Automated Messaging: Instant Reply, Away Messages, and FAQ’s.
Instant Reply: When turned on, this message will always be sent as a reply to your customers when they first message you on Facebook.
Away Messages: When turned on, an Away Message will automatically send to a customer who messages you. Away messages run on a schedule, which you can customize for your branch.
Note: If you are running an away message and also have instant replies turned on, people will receive an away message instead of an instant reply.
FAQ’s: The Frequently Asked Question feature allows you to provide your customers with prompts to learn more about your business, inventory and services. We will elaborate on this feature in the advanced section of this guide.
Guide And Examples
In order to run automated messages, you first need to navigate to the Inbox settings tab of your branch’s Facebook page. I recommend accessing this on a computer/laptop using the Chrome browser.
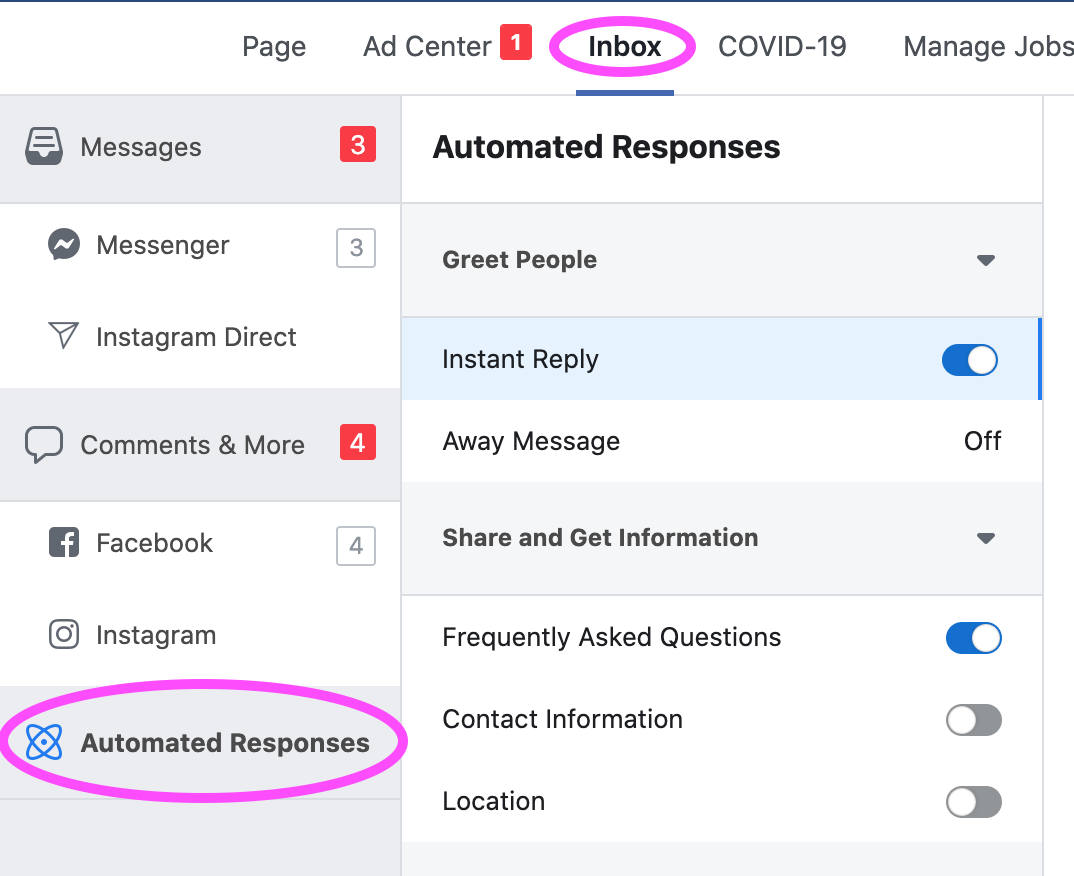
Next you will click on either whichever section you want to work on. Let’s begin with Instant Reply.
Setting Up Instant Reply
To turn on Instant Reply, you simply click the toggle button. It will switch to a blue shade when turned on. You will also see a notification that Instant Reply is turned on.
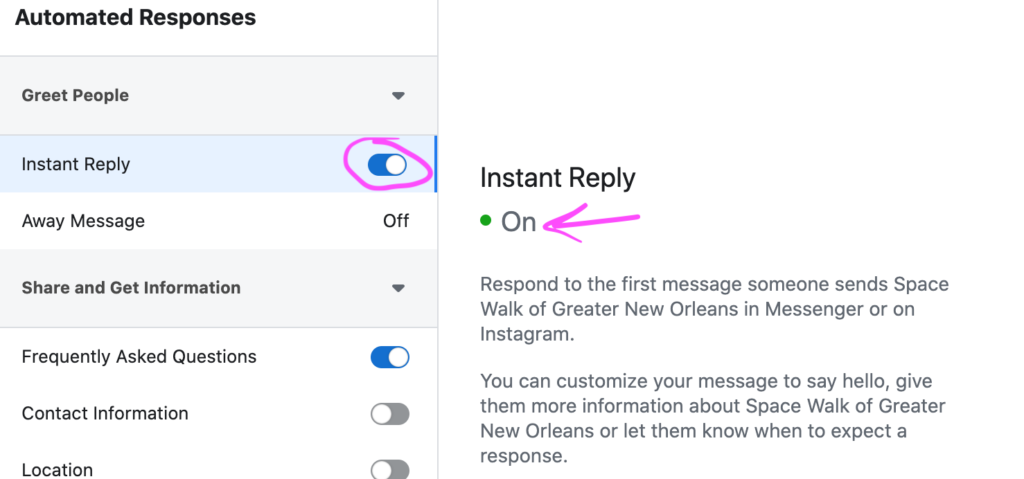
Click the Edit button to open up the text editor for your Instant Reply. Here you can type in whatever message you would like. One function to point out is personalization. This function allows you to have messages personalized for your customer and branch info.
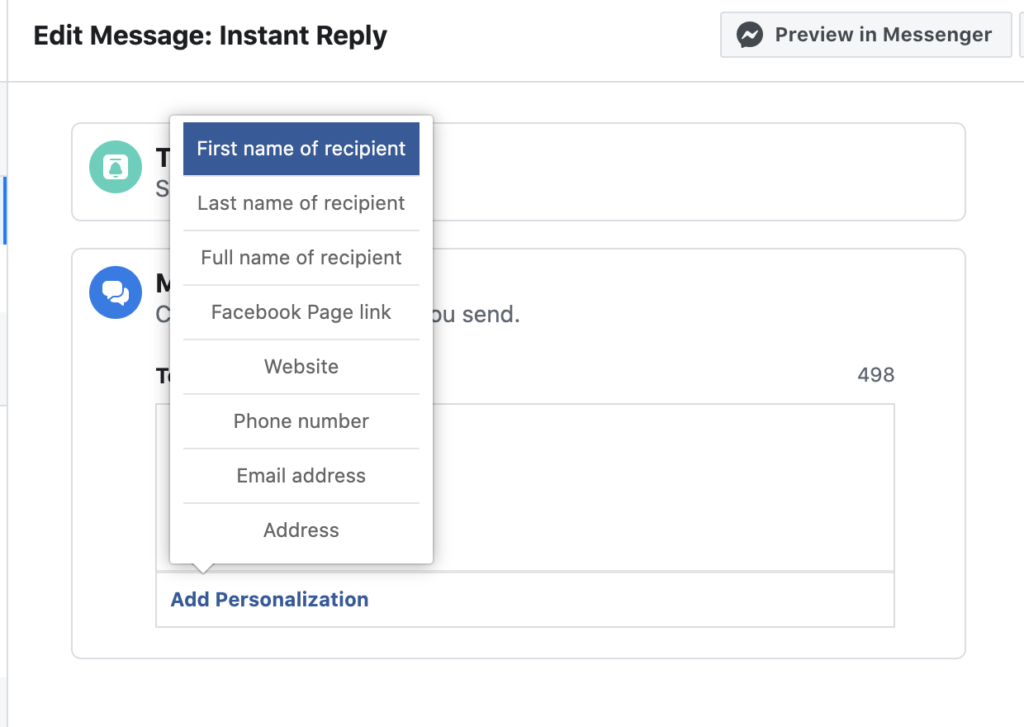
As you enter in personalization tokens, they will appear in the text window as blue boxes, with a preview of the data that will be displayed:
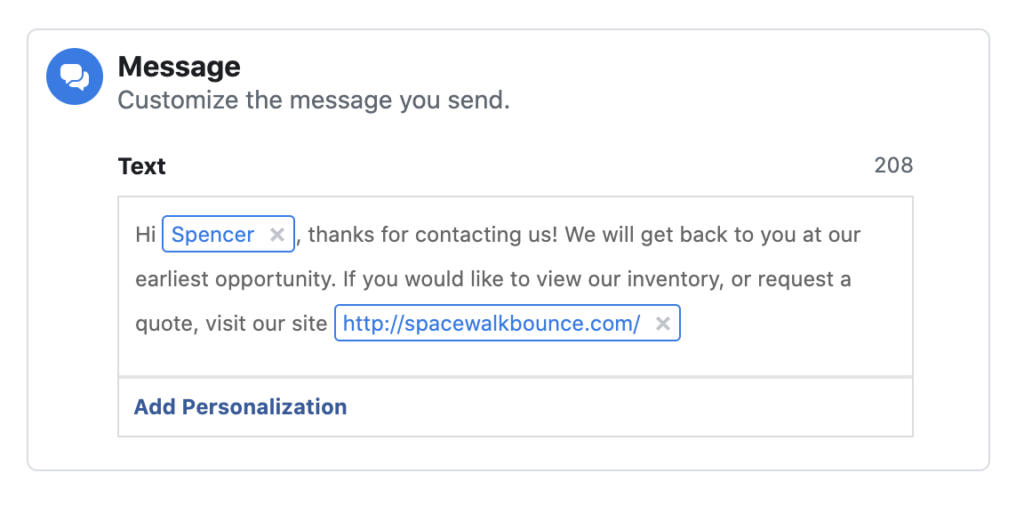
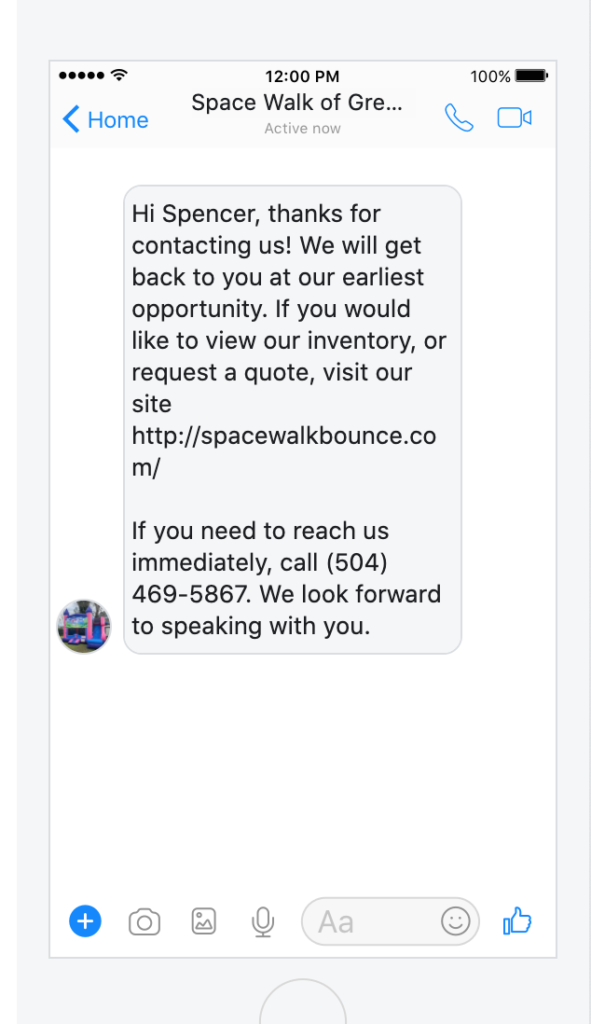
I recommend using the first name, website, and phone number personalization tokens. Feel free to use this example, but keep in mind you will need to add the personalization tokens yourself after pasting this into Facebook:
Hi [first_name], thanks for contacting us! We will get back to you at our earliest opportunity. If you would like to view our inventory, or request a quote, visit our site [website]
If you need to reach us immediately, call [phone_number]. We look forward to speaking with you.
You can verify your personalization tags are generating the correct info when you see them load in the preview window:
Setting an Away Message
Writing an away message is exactly the same as an Instant Reply. But in addition to the writing tools, you can schedule your Away Message to run at certain times. For example, if you work a part-time job during weekday mornings you may want to set an away message. This way your customers get a quick reply should they send you a message while you are busy working.
Let’s look at the scheduling tool. First, you will set your time zone. This can be a bit confusing. I recommend typing in America, and picking the time zone you share with a major city. Since New Orleans is on Central time, I would select the America/Chicago time zone. If I were on Eastern Standard Time I would select the America/New York time zone.
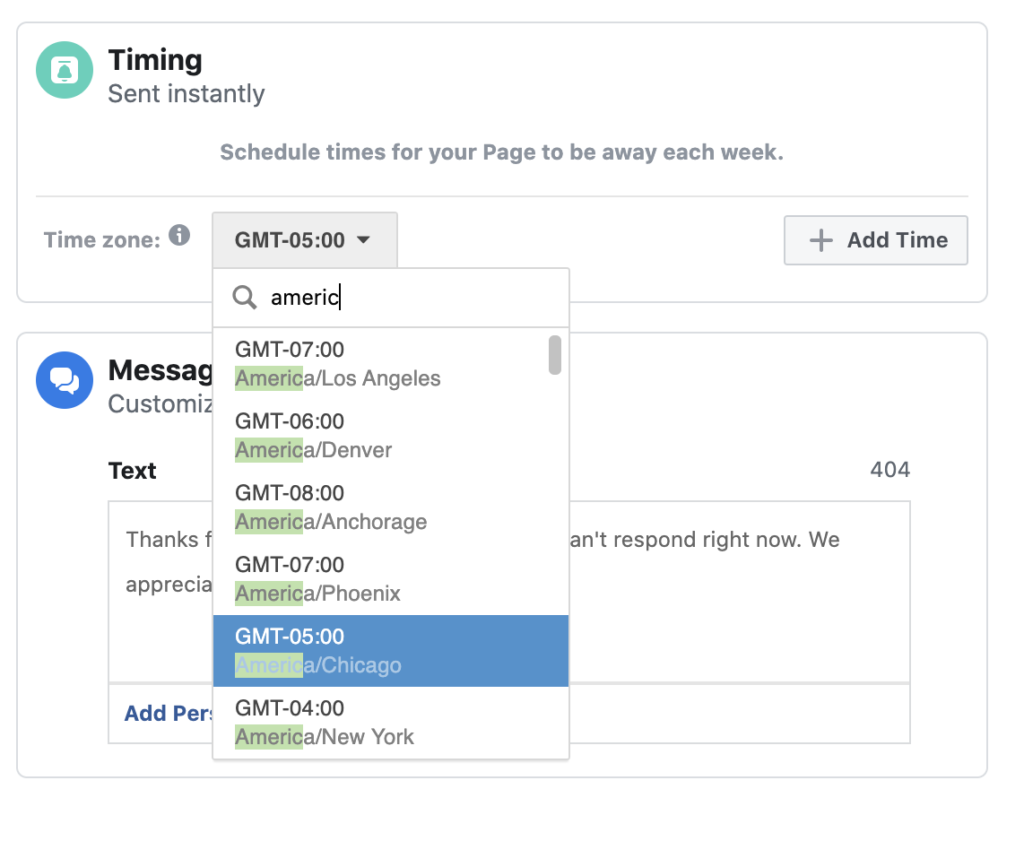
Once you have your time zone set you can add away messages. Following our example, I am going to select Monday-Friday setting an away message from 8am-noon.
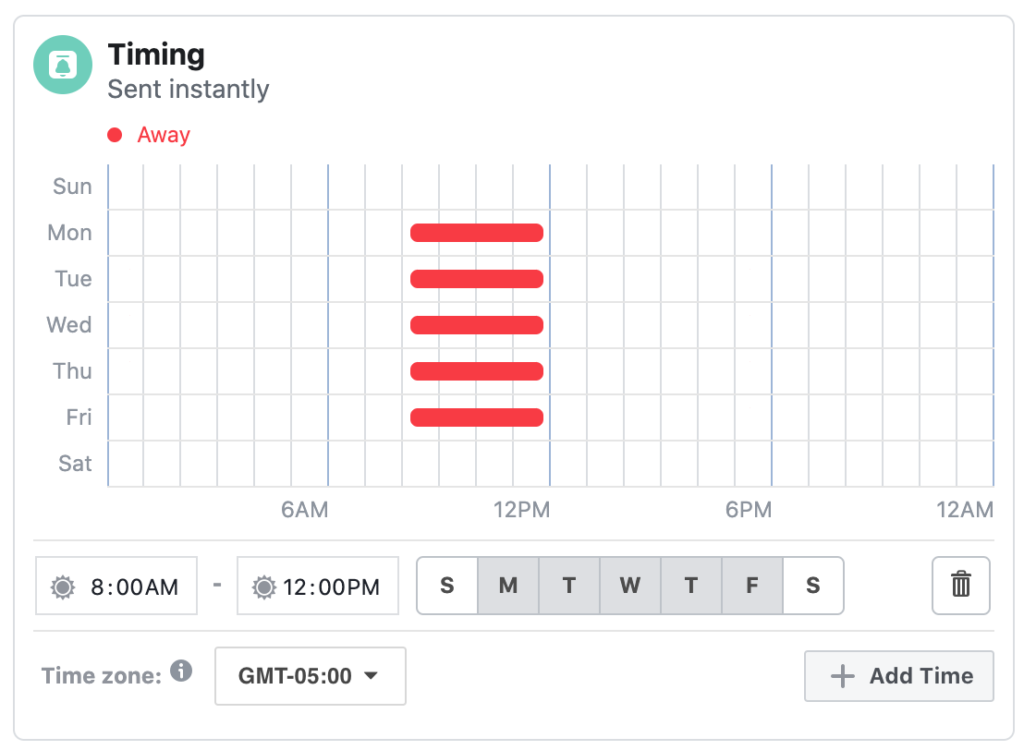
If you need to add other times for the away message to display, click the Add Time button, and you can add additional days onto your schedule, or additional times within the same day.
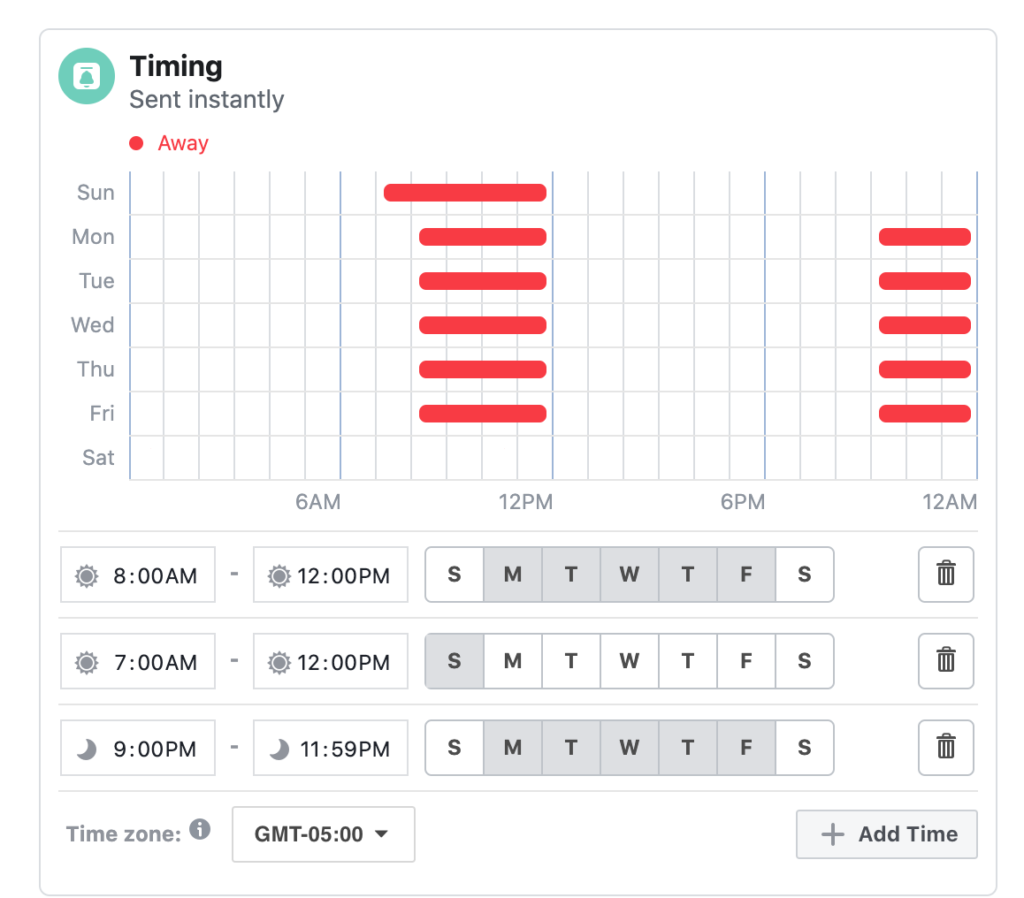
Once you have your schedule set, click save, and your away message will be queued up as scheduled! Remember, if you have both away messages and instant reply on, the away message will display instead of the instant reply (during scheduled away windows only).
Advanced Automation: Setting Up FAQ’s
When you activate FAQs, a batch of up to four questions/prompts appear at the beginning of a conversation with your Page. Automated responses are sent instantly after someone taps a question.
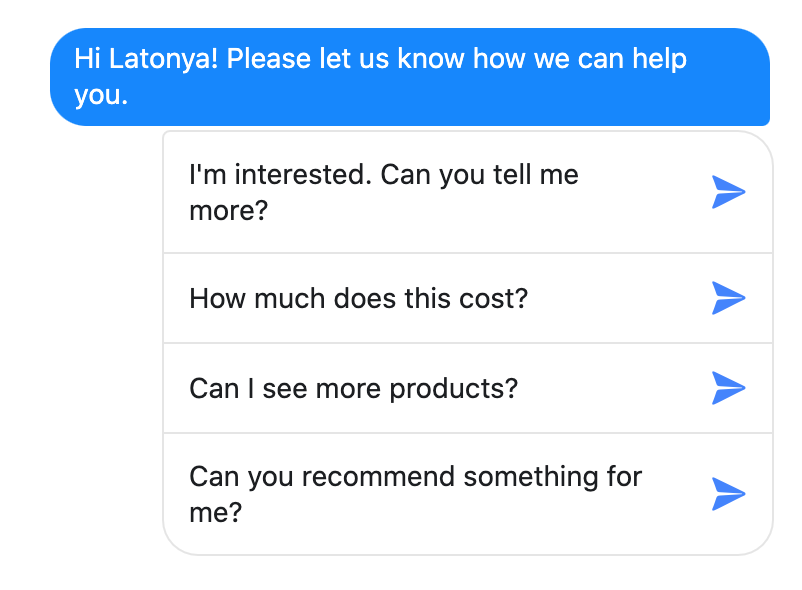
Creating FAQs consists of writing a question prompt, which is tied to an answer. This has the same personalization functions as the instant reply and away messages. You can also add a photo or video to these replies as attachments. Or you can add a button that points to your website.
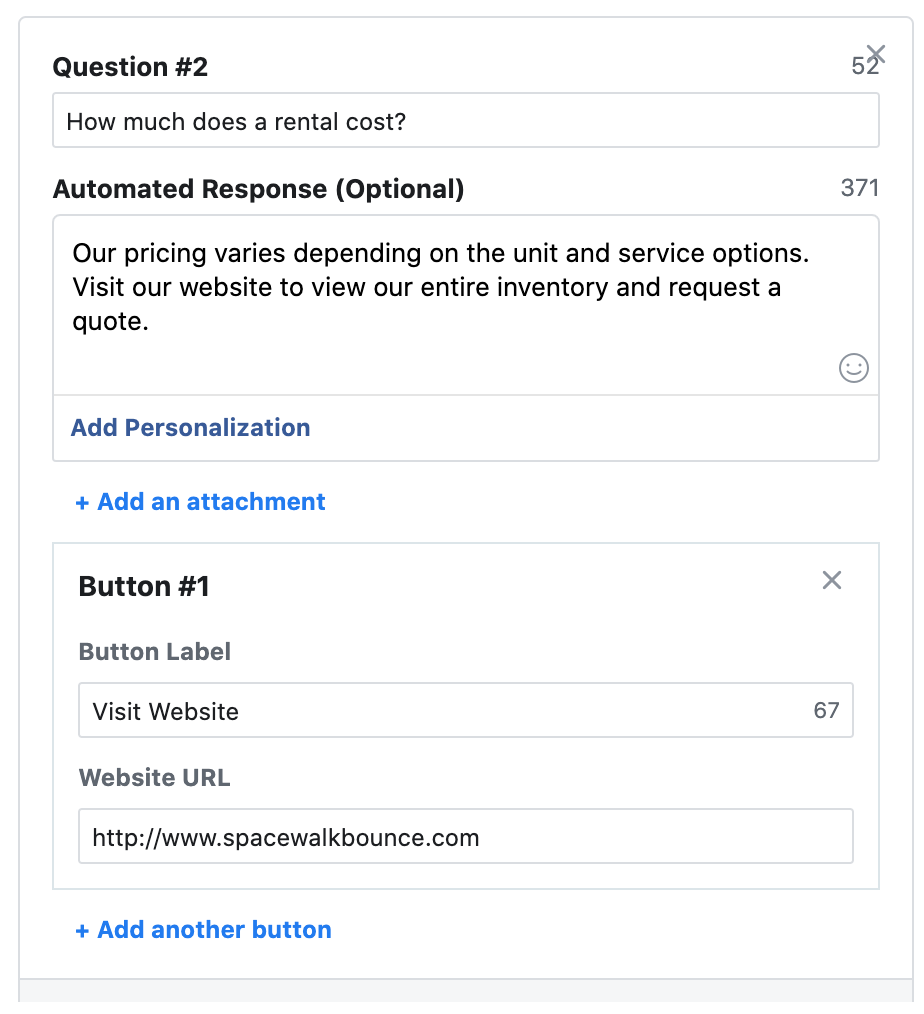
You can also choose to add these questions to a menu which people can access throughout the entire conversation. To do this, simply toggle the option ‘Add to Menu’ to the On position. When this is activated, your FAQ prompts will display on the keyboard for your customers when they are writing messages to you.

Here is how FAQ answers look on the customer’s end:
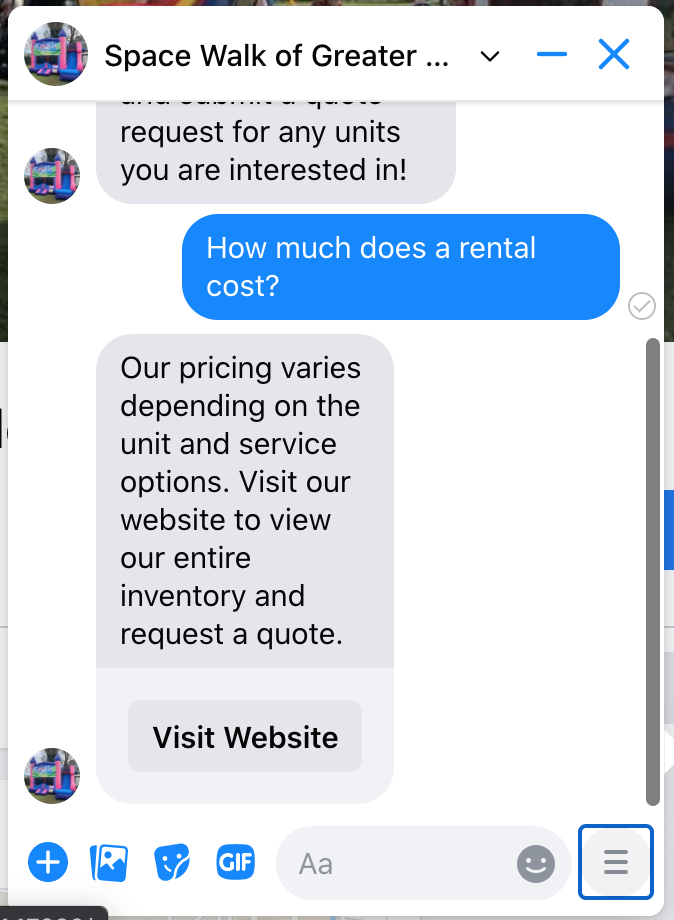
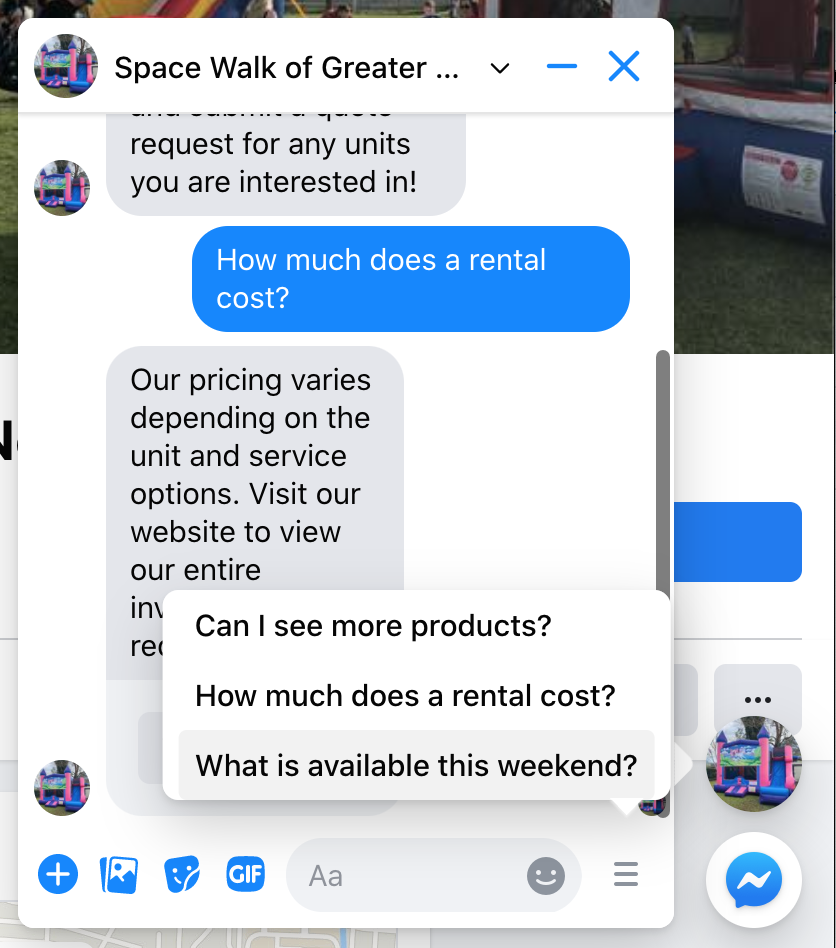
Feel free to use the examples below for your own page. Keep in mind you can choose to display a minimum of one question and a maximum of five.
Examples:
Question: Can I see more products?
Answer: Our entire inventory is available to view at our website [website]. Check it out and submit a quote request for any units you are interested in!
Question: How much does a rental cost?
Answer: Our pricing varies depending on the unit and service options. Visit our website to view our entire inventory and request a quote -[website]
Question: What is available this weekend?
Answer: Visit our website and submit a quote request for the unit you are interested in. If available, we will reply with pricing. If booked, we will reply with a few alternatives – [website]
Question: Where are you located?
Answer: We meet with our customers by appointment only. Submit a quote request for the item you are interested in on our website, and we can reply with availability, pricing and service options – [website]
Building out your automated messaging may feel like an advanced, time-consuming task. But I highly recommend investing the time necessary to setup your page with this. It’s easier than you’d think, and greatly enhances customer communication. This will help push customers to your website to submit a quote request, with far less time taken from your day.
